This is why you need a personal Collaborator Client!
If you have used Burp’s collaborator client for your Out-of-band testing, you know it’s awesome. Then why there is a need for a personal collaborator client? There are a few things that need to be addressed.
- Companies have started to blacklist burp collaborator’s domain, making it difficult for OOB vulnerabilities detection. (Read here)
- Collaborator client is not available for the community/free edition of BurpSuite.
This brings the need for having a personal collaborator client, with no to minimal investments, that will help us in the detection of any out-of-band/blind vulnerabilities, and I have linked an amazing cheatsheet below that will guide in OOB Exploitation. So, let’s get started. Below are the things required for our recipe to cook:
- Domain Name
- Personal Server with a public IP address.
- tcpdump
I will be using tcpdump, but there are several other tools that you can utilize for the same, like BindDNS – How to setup a BIND9 DNS server for OOB Exfiltration and even you can setup your own private burp collaborator, with the professional and enterprise edition of BurpSuite.
Let’s get started!

First off we can start by creating a server for ourselves, for this task, I am using AWS and its free tier of EC2 instance.
Refer to the article to create an EC2 instance – https://www.howtoforge.com/how-to-create-an-ec2-instance-on-aws/
While creating the Ubuntu EC2 instance, we have to open a port – Port 53, which will help us capture any DNS request. We can also do the same after the instance creation by modifying the Security Group.
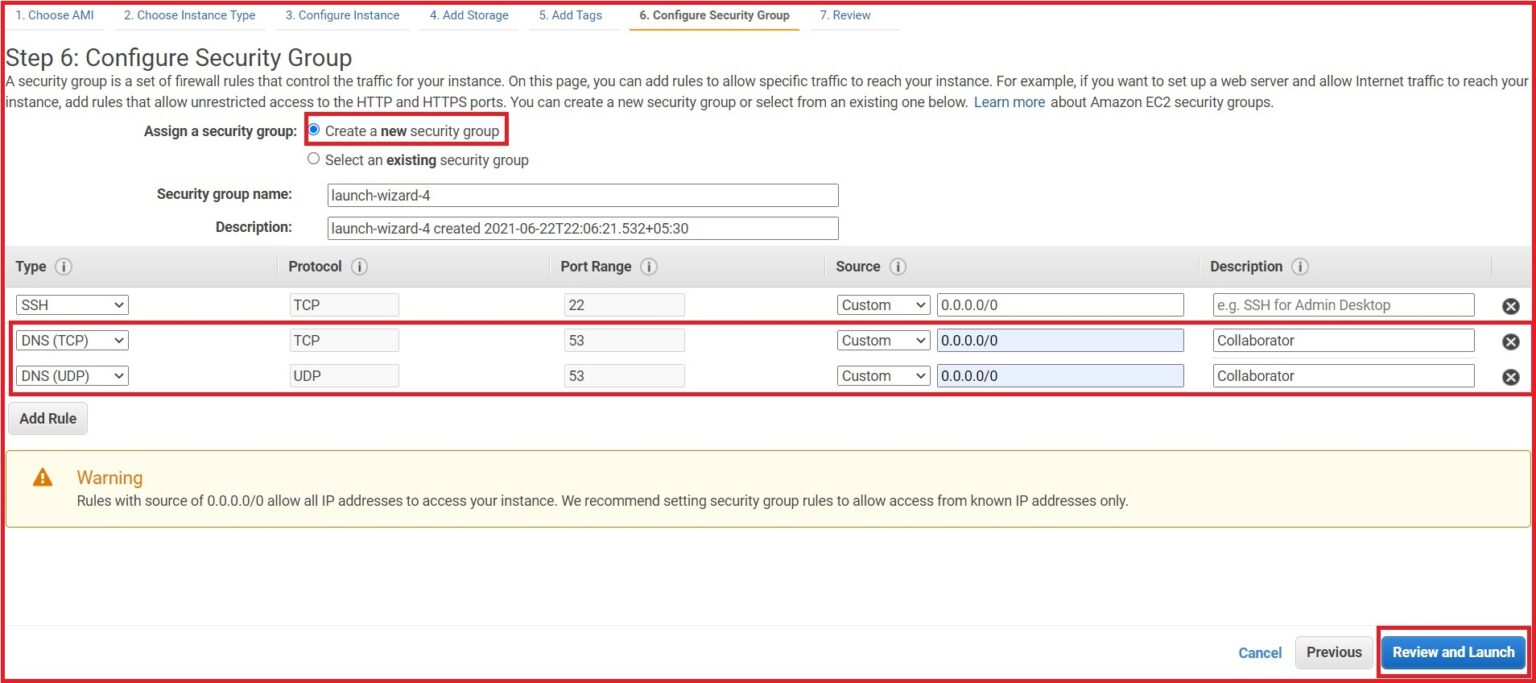
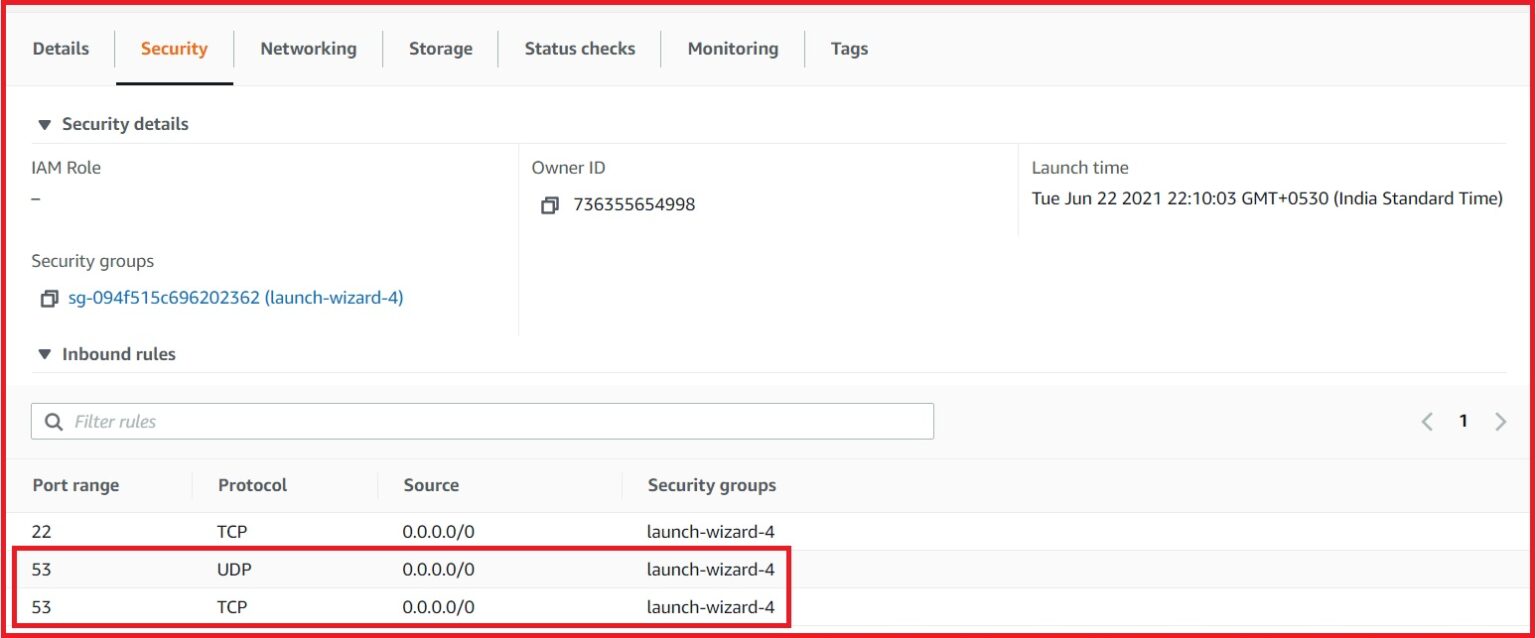
And in order to verify the inbound rules of the instance, we can look at the security tab –
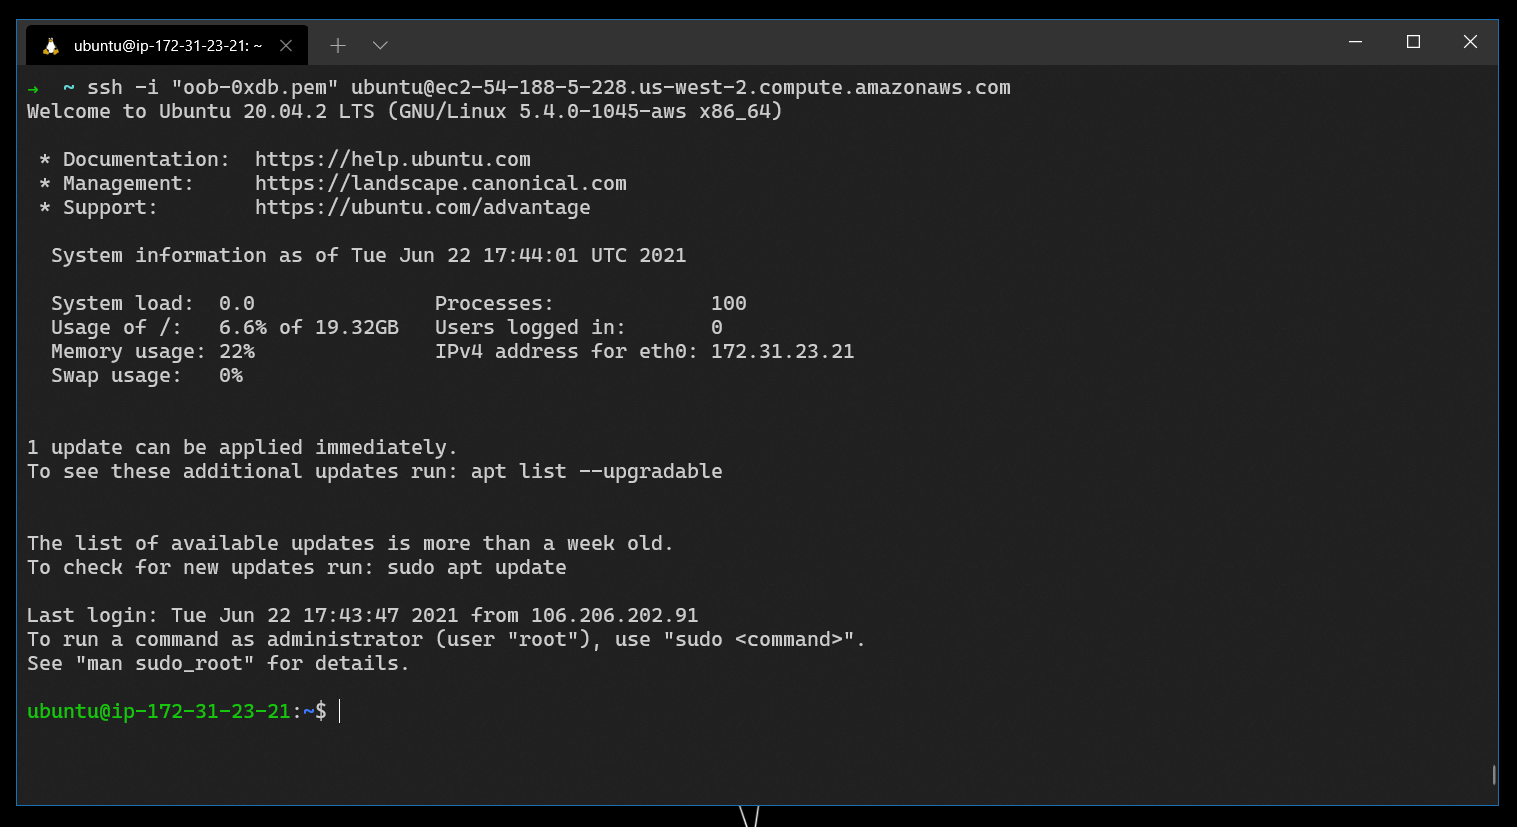
Now, we are all set. We have an instance with an public IP associate with it. With the use of SSH keys, we can login into the instance.
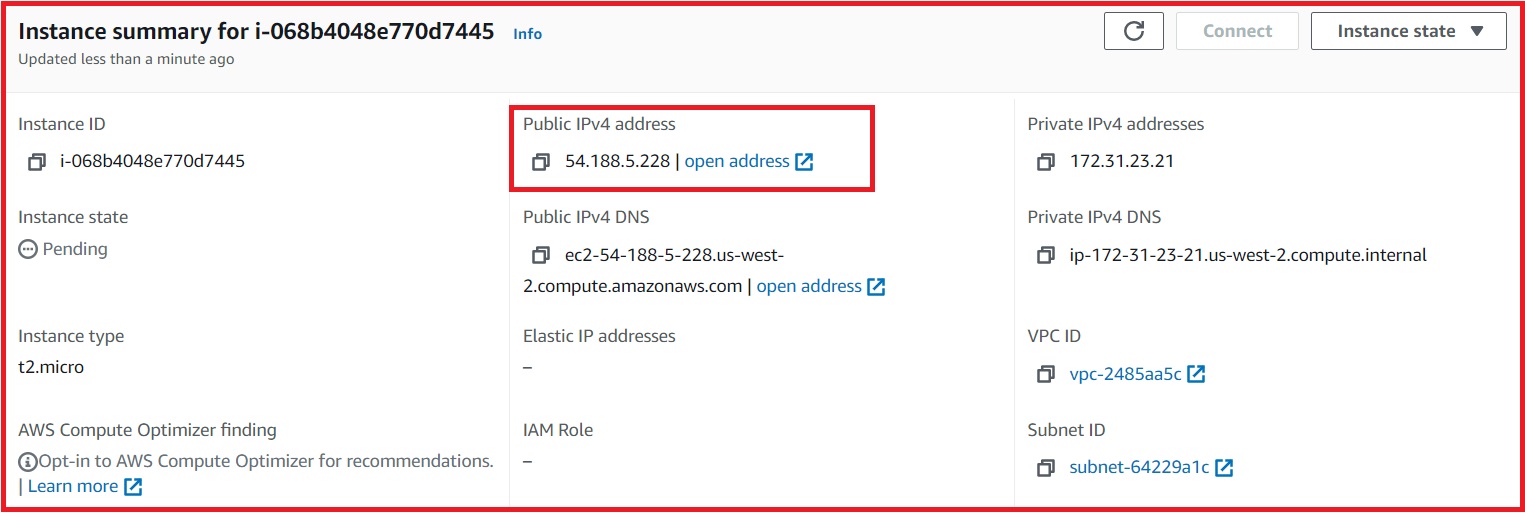
Public IP address associated with the Instance
Now, we have to configure our domain to act as we want it to. I have bought a domain from GoDaddy but domains can be bought for no price, if you are a student, using GitHub Student’s Pack.
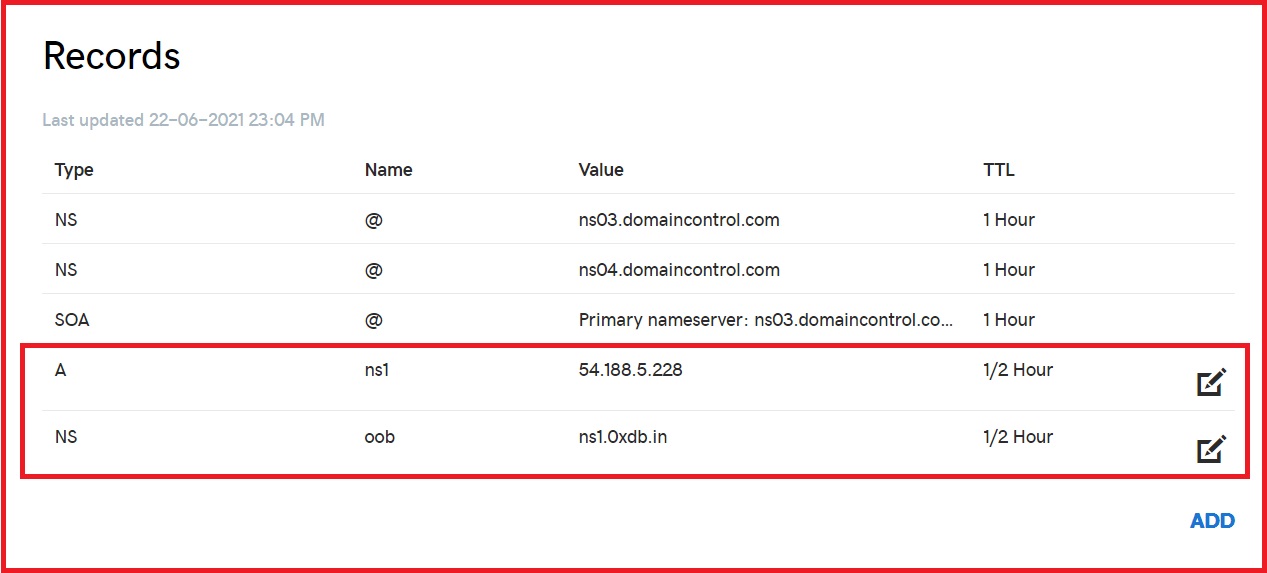
Let’s open up the DNS management panel of GoDaddy, because we need to add some records to the Domain Name in order for our thing to work.
We need to add an A record that will point to the public IP of the instance, and another one as a nameserver (NS) record that points to the A record pointing to the public IP of the instance, which will route all the DNS requests for the subdomain to our server.
This will take some time to propagate throughout, you can track the propagation at over – https://www.whatsmydns.net/
Once, the propagation is done, we can login to our instance and see how we can do capture the requests.
As mentioned earlier, we are going to use tcpdump for capturing the DNS requests. Let’s give it a go!
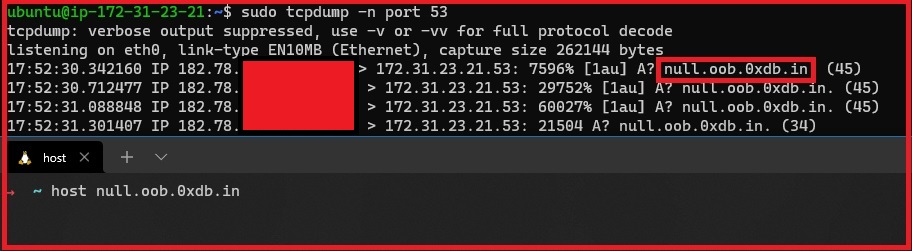
We are now able to capture the DNS request that is being sent to the subdomain that we have configured.
Woohoo! We have now made our own collaborator.

For further reading about OOB exploitation – https://notsosecure.com/oob-exploitation-cheatsheet/.
For OOB detection, we also have an alternative solution by Project Discovery – Check it out! – https://github.com/projectdiscovery/interactsh
P.S.: This project was the outcome of null Web Security Study Group.
Thank You!