My Experiments with Raspberry Pi Pico - Poor Man's Rubber Ducky
Mr. Robot Season 2 Episode 9 - “Rubber Duckie, You’re The One” - I was fascinated by this piece of technology when I first saw it many years ago. Then I looked it up on the internet to learn more about it, and it turned out to be HID, or Human Interface Device. It basically imitates users and executes code or performs actions in their place.
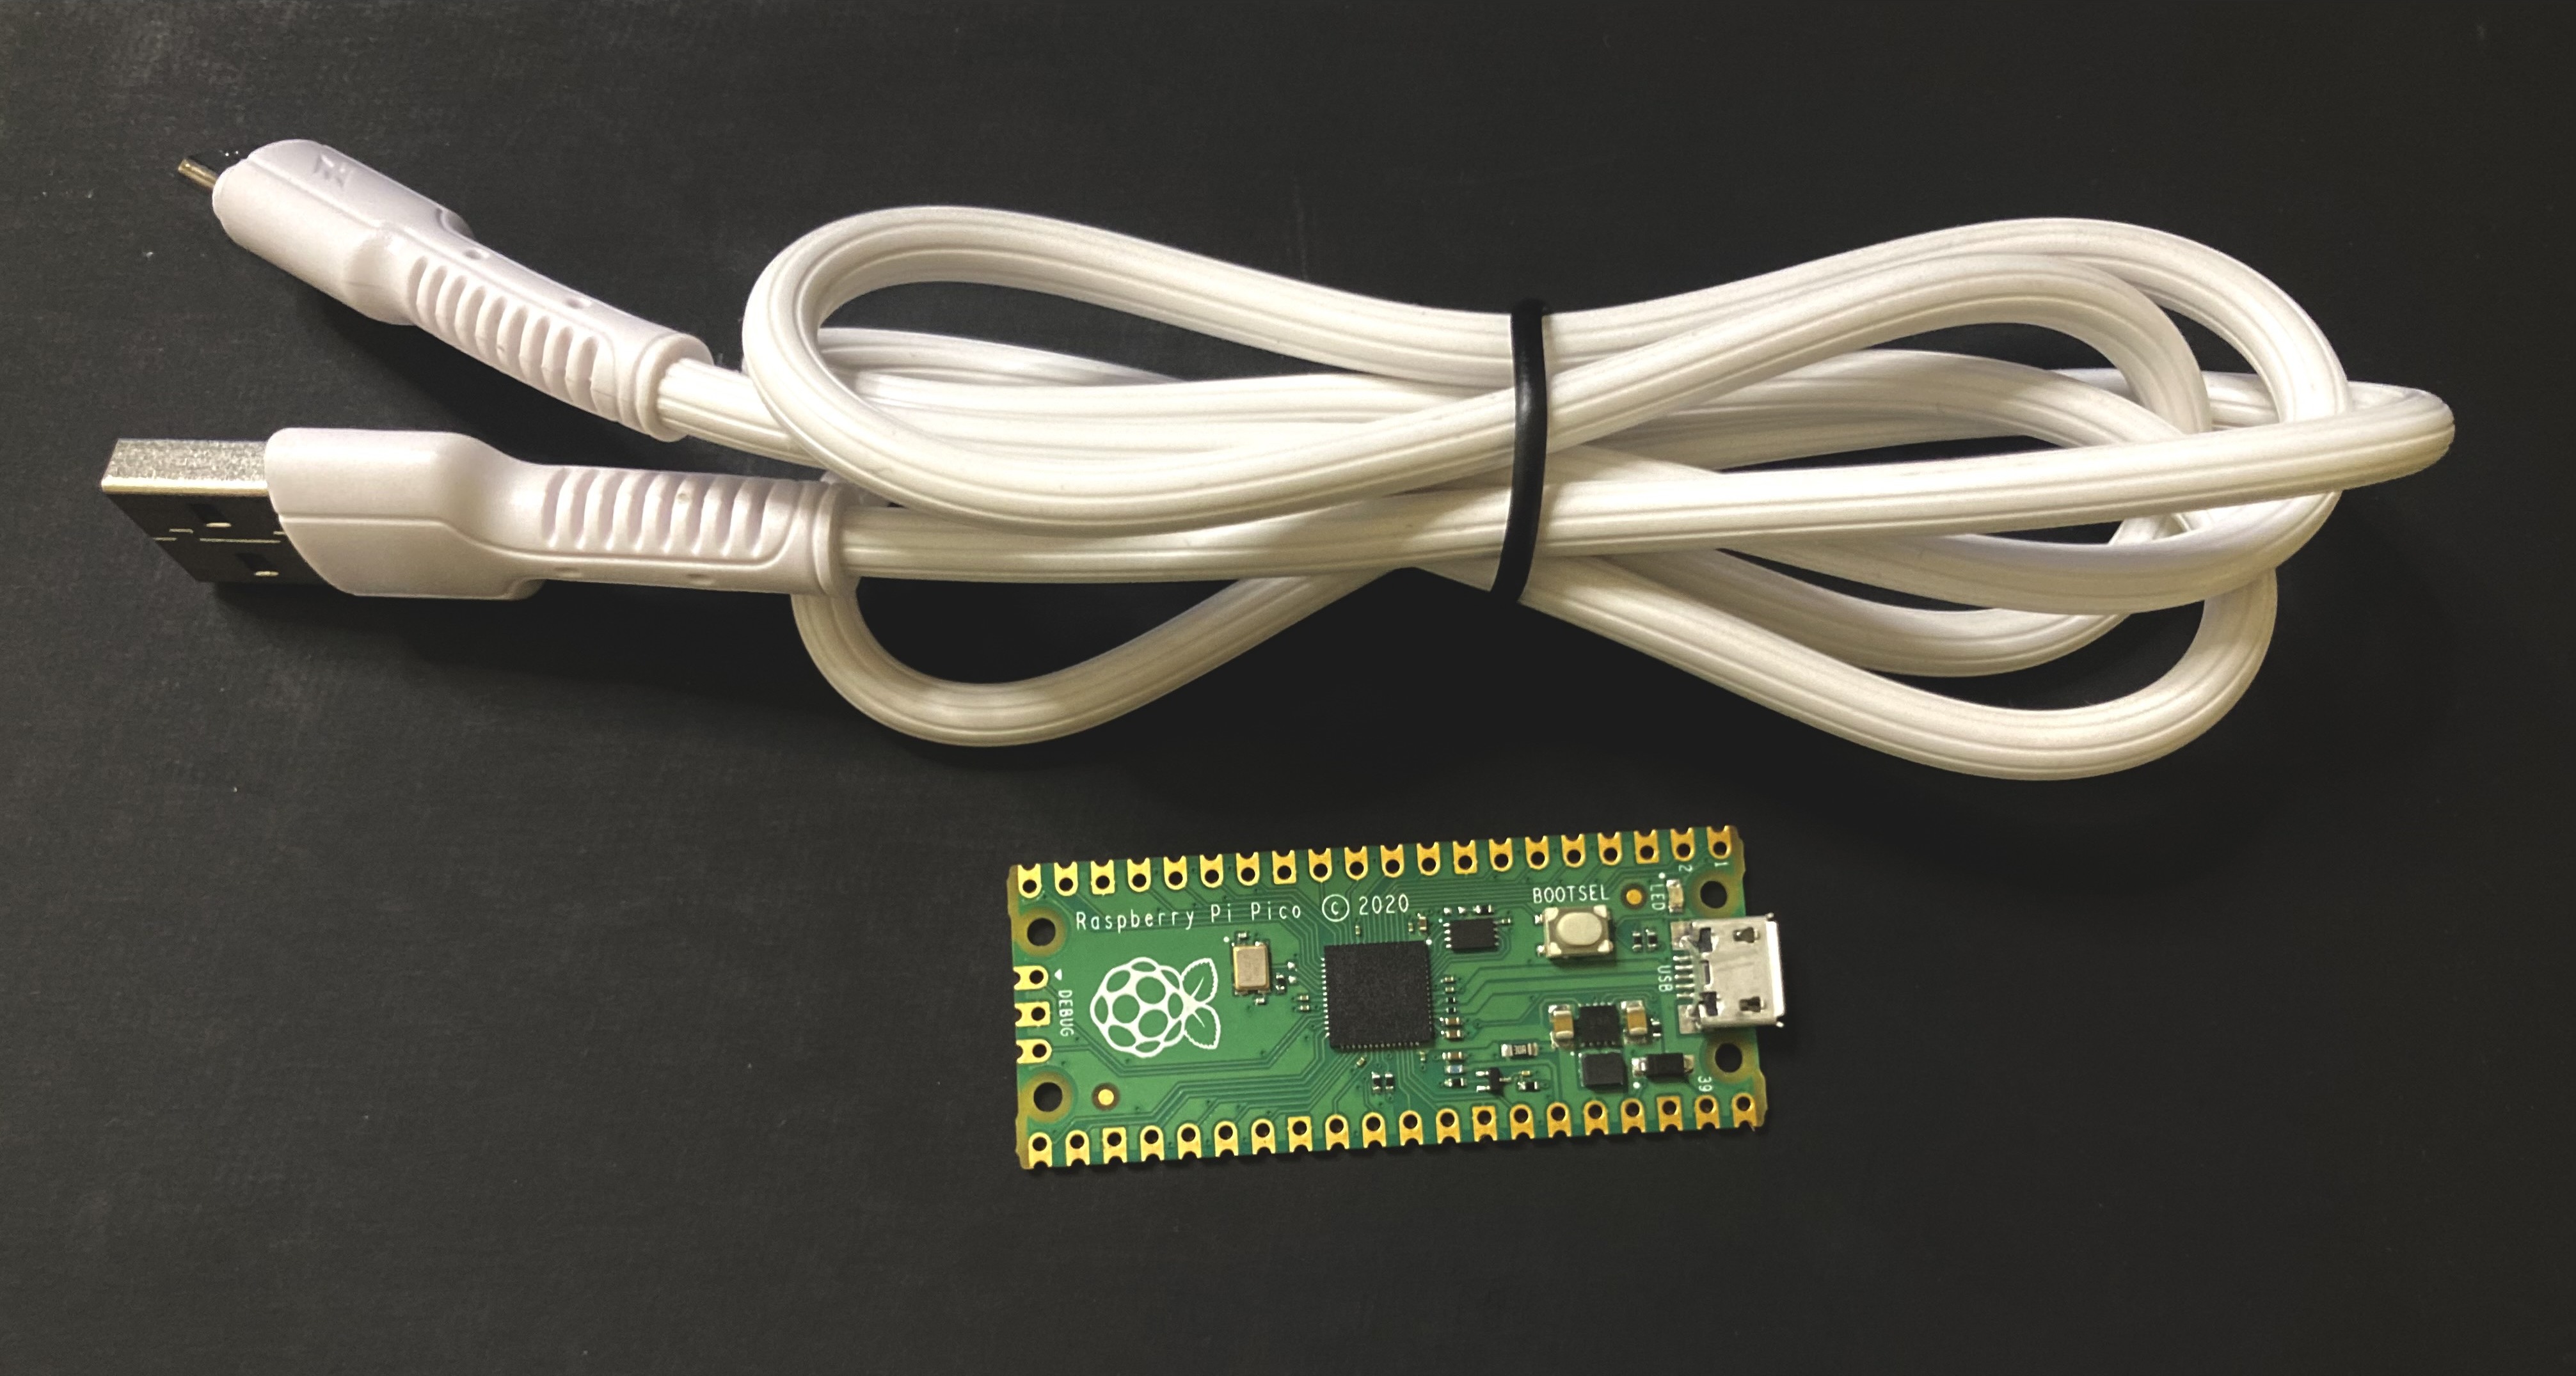
Since the real rubber ducky was out of my budget, I looked for alternatives and discovered that similar behaviour to the rubber ducky can be achieved using a less expensive piece of hardware - the Raspberry Pi Pico (7$).
In this blog, I will share my experiences while experimenting with the Raspberry Pi Pico, as well as how to configure it to behave like a rubber ducky.
Along with the Pi Pico, also get a “Micro USB to Type A USB Data Cable”, as it will be required during the entire setup - Buy Link (Amazon)
Prepping Up!#
Before diving in, download the following files to get started with the story -
- Circuit Python Firmware for Raspberry Pi Pico
- Micro Python Firmware for Raspberry Pi Pico
- Clone the repository for Program to Make the Pico into Rubber Ducky
- Delete the Firmware and Data
- VS Code & PyMakr Extension
Don’t worry if things does not make sense, they eventually will after the end of the blog.
Now, Lets Get Started!!

We have to setup our environment to program the micro-controller. The setup I am using contains the following component -
- VS Code
- PyMakr Extension
- Environment - Ubuntu 22.04 LTS
- The Programming Language - Circuit Python
Note - Raspberry Pi’s documentation suggests the use of Thonny (as the IDE) and MicroPython/C or C++ SDK for development.
Small Analysis Table of the different Programming Languages supported -
| Micro Python | C or C++ SDK | Circuit Python | |
|---|---|---|---|
| Remarks | Gives the basic implementation of Python with a few modules loaded. | Allows customization with good community & libraries support. | Based of micro python. Good Community Support and good number of modules/libraries |
| Easy of Learning | Easy | Moderate - Tough (depends on experience) | Easy |
| Library/Support | Poor library support | Good library support | Good Library Support |
And instead of Thonny, I used VS Code because of it’s ease and familiarity of use. And to detect the serial ports and communicate with them, we will use the VS code extension - PyMakr (It will require node js to be installed in the system) and then restart the system and reconnect the device.
Before installing Circuit Python, let’s install Micro Python and see how exactly it works?
Installing the Firmware#
To instal any firmware, we must first enter the hardware’s storage mode. In this case, press and hold the Pico’s BOOTSEL button while connecting the Data Cable, and it will connect as a storage device. Simply copy and paste the downloaded firmware (*.uf2) into that storage (RPI-RP2), and it will restart and run that firmware.
Installing MicroPython for Initial Analysis#
Why do we need to install MicroPython, when we can directly flash Circuit Python Firmware? The only reason is to understand the limitations.
Follow the steps mentioned in the intial section to install MicroPython. So, now we have flashed the Pi Pico with the MicroPython and replugged it in the system. How do we know if it is connected? (because without the BOOTSEL, it won’t show any storage device). It will connect to the computer via a COM port or Serial Port.
$ sudo dmesg
...
[35535.861989] usb 1-1.2: new full-speed USB device number 53 using xhci_hcd
[35535.965147] usb 1-1.2: New USB device found, idVendor=2e8a, idProduct=0005, bcdDevice= 1.00
[35535.965156] usb 1-1.2: New USB device strings: Mfr=1, Product=2, SerialNumber=3
[35535.965160] usb 1-1.2: Product: Board in FS mode
[35535.965163] usb 1-1.2: Manufacturer: MicroPython
[35535.965167] usb 1-1.2: SerialNumber: x6612483xx462624
[35535.974561] cdc_acm 1-1.2:1.0: ttyACM0: USB ACM device
...
It above output states that the device is connected and is named as ttyACM0 (/dev/ttyACM0).
Now, open the VS Code and open the tab for PyMakr Extension. It will ask you to create a PyMakr Project and if you see in the bottom, it has already recognized the device connected to the Serial Port.
We can use PyMakr to spin up a MicroPython interpreter shell, for testing out different command -
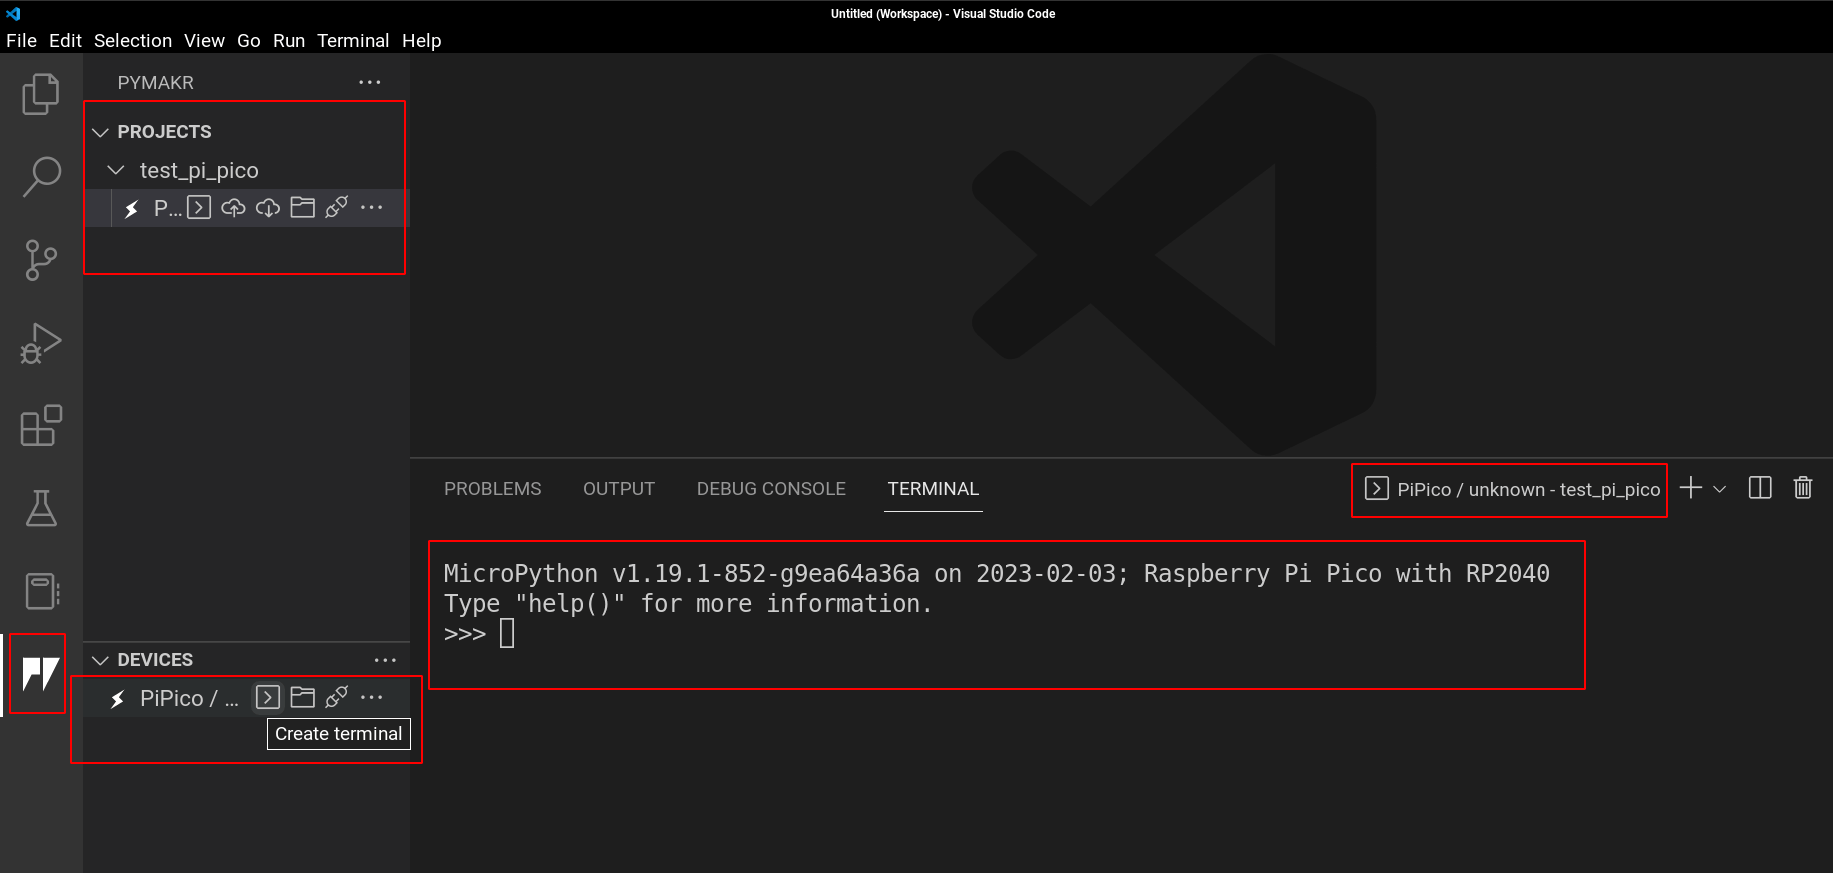
Running help(modules) in the MicroPython interpreter to get the available modules -
>>> help('modules')
__main__          framebuf          uasyncio/funcs    ujson
_boot             gc                uasyncio/lock     umachine
_boot_fat         math              uasyncio/stream   uos
_onewire          micropython       ubinascii         urandom
_rp2              neopixel          ucollections      ure
_thread           onewire           ucryptolib        uselect
_uasyncio         rp2               uctypes           ustruct
builtins          uarray            uerrno            usys
cmath             uasyncio/__init__ uhashlib          utime
dht               uasyncio/core     uheapq            uzlib
ds18x20           uasyncio/event    uio
Plus any modules on the filesystem
You can also check if the board is working properly and is able to interpret the commands or not using the following code - which will blink the LED on the board -
from machine import Pin
led = Pin(25, Pin.OUT)
led.value(1) # To switch on the light

led.value(0) # To Switch off the light
Like this you can play around with the MicroPython. But we need more…
Setting up Pi Pico with Circuit Python#
Now, that we have our system ready to accomodate Pi Pico and have tested that the device is working, we flash the hardware with Circuit Python, so that we are able to run python commands in it. To do so, follow the steps -
- Get the Circuit Python Firmware for Raspberry Pi Pico from the official website.
- Hold the
BOOTSELbutton on the hardware and connect the Pi Pico with the USB Cable.It will enable the device to be identified as a storage device (RPI-RP2), otherwise it will be identified as a serial device by default. - Copy the circuit python firmware and paste it in the
RPI-RP2drive. - The device will disconnect itself and will be running Circuit Python on it.
There will be a few observations -
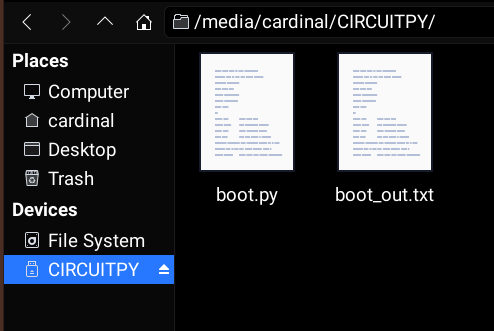
- By default the storage (CIRCUITPY) will be enabled upon plugging in the USB Cable. It’s not the same storage as
RPI-RP2that we earlier saw. It is the storage, where we can store the payload and data. - We will have two file -
boot.py- This file will run on boot time of the device.boot_out.txt- This will contain information about the device and firmware.
Now, we have Circuit Python Installed. We now need libraries to work with it. Use the link to download the libraries - Circuit Python Lib/Examples Bundle. We will be using it based on our use case.
Now, we have everything to install program that will help in the interpretation of the ducky scripts/payloads.
For this - pico-ducky will be the program that’s going to help. Follow the Install Instruction in the repository to install pico-ducky in the device.
You can use the pre-made ducky script which can be downloaded from here - Hak5 Payload Hub.
Setup Mode#
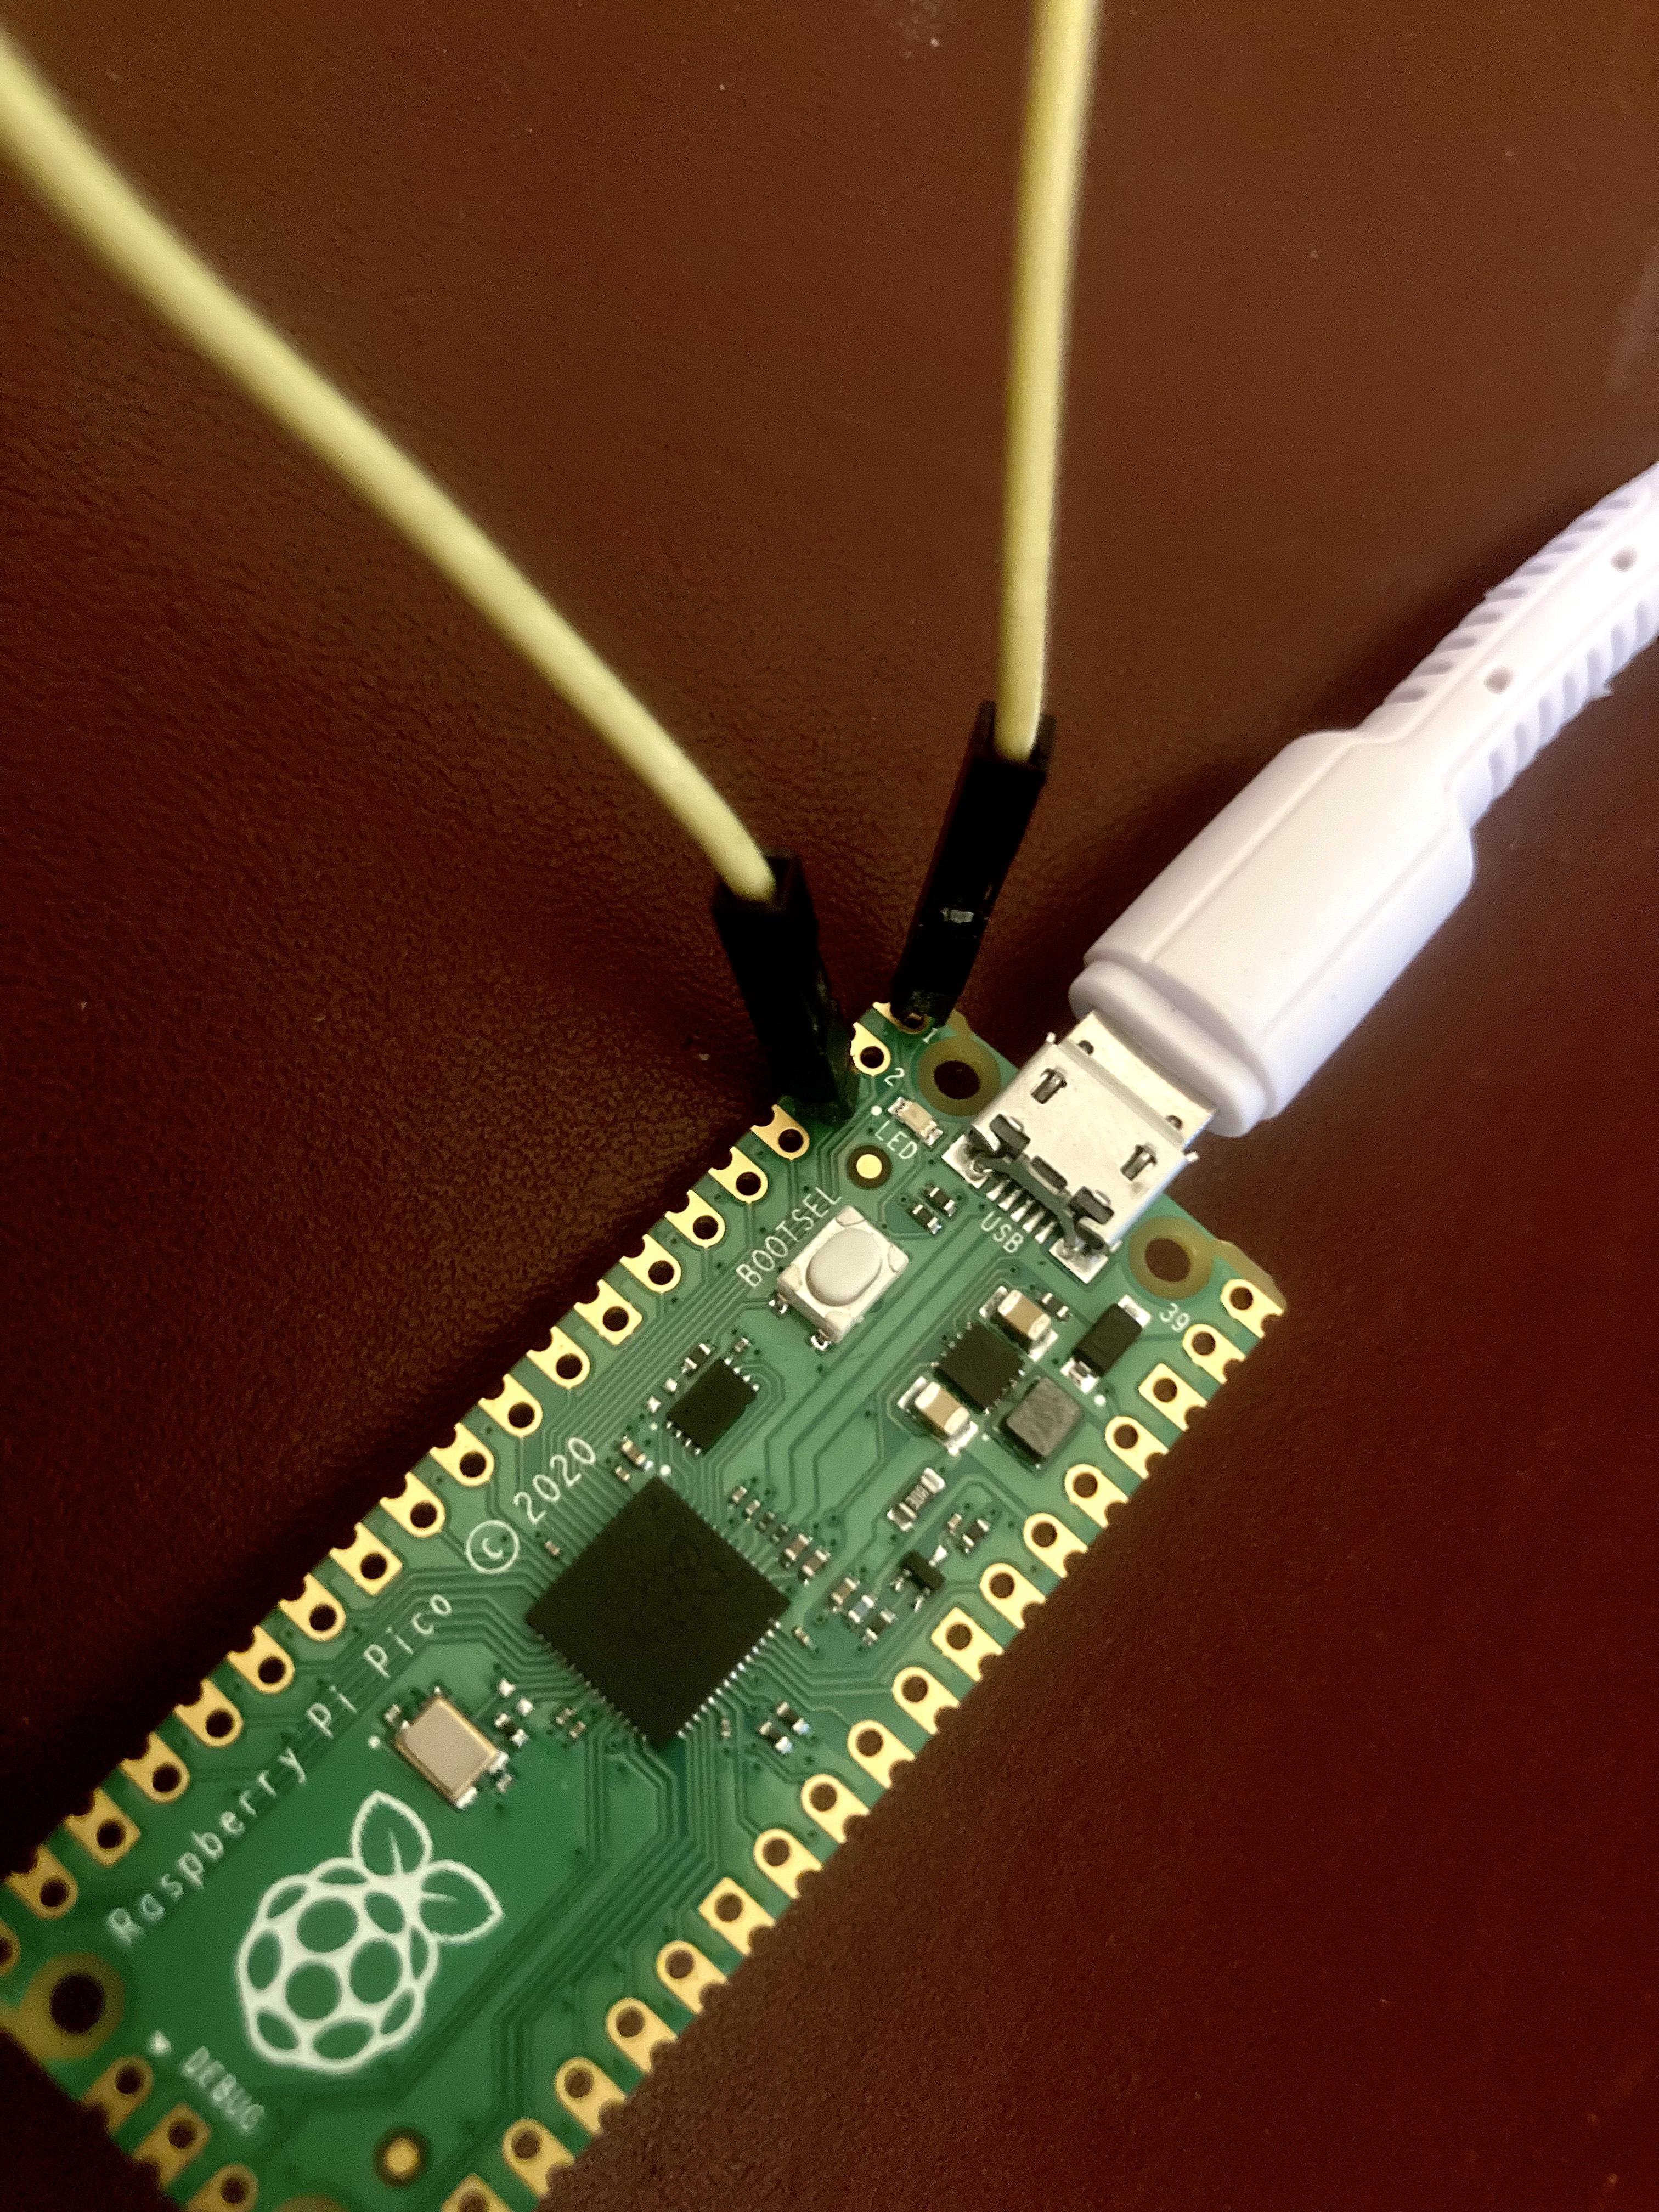
Now, that you have followed all the steps and plugged out the Pico which contains the payload. It will run on your system as well, so to avoid that we need to connect pin 1 (GP0) to pin 3 (GND) together using jumper wires, so that it does not inject the payload in our own system.
USB Storage Enable/Disable#
For production environment, you might want to -
- Disable the USB Storage (As it is easily detectable and even at some places USB is not even enabled).
- To do this Connect a jumper wire between pin 18 (
GND) and pin 20 (GPIO15). This will prevent the pico-ducky from showing up as a USB drive when plugged into the target computer.
- To do this Connect a jumper wire between pin 18 (
- Enable the USB Storage (For exfiltration of Data) - Default.
Remove Any Firmware From The Device#
- Download flash_nuke and copy it.
- Enter the setup mode and paste it in
RPI-RP2, it will remove the firmware and any associated file from the storage.
I hope it will help you build your own Rubber Ducky Equivalent. Have fun and use it only via ethical ways.
Hit me up over my socials, if you come across any questions or suggestions.
That’s all for now, I will keep on posting more interesting exploration stories here on my blog.
Adios!